
If you’re looking for an easy camper update, you’re probably not going to Google “installing a tile backsplash in an rv” because that seems nuts, right? Well, maybe you did Google that and that’s how you ended up here. If so, awesome and welcome – you’ve found the right place. But you’re probably just looking for an easy way to spruce up your camper. We’re going to walk you through it step-by-step.
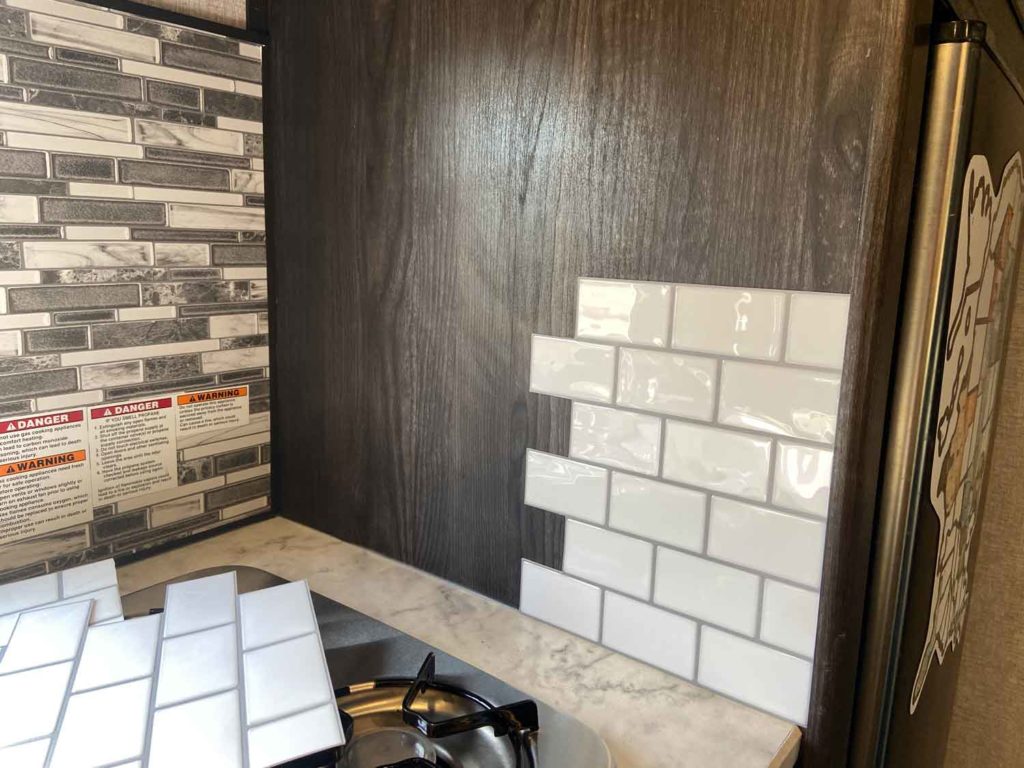
We’re not really talking about tile. What we’re talking about are these peel and stick subway tiles that are ultra-lightweight and basically look like real subway tile. Anyone who pulls a camper knows that weight is key and these things weigh only ounces. Plus they’re high-gloss and wipe clean quite nicely – thus a perfect thing for the kitchen.
Measure the Area
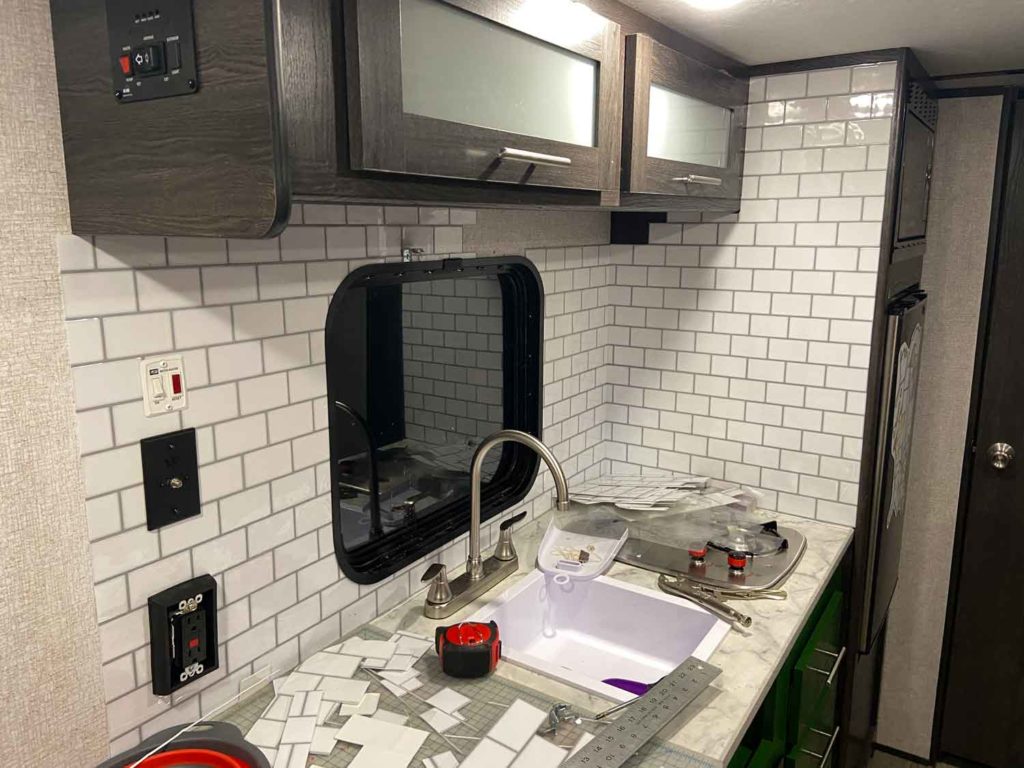
Before we begin, you need to measure the area. We need to figure out exactly how much tile to purchase. And be careful here because it’s not as straight forward as it might seem. You have to account for waste and cut pieces. As an example, these tiles are 12″x12″, but they’re designed to overlap by 2″ on each side. So really, they’re 8″x12″. And if your space is 14″ tall, you still need two rows of tiles!
When you’re installing a tile backsplash in an RV, one thing to keep in mind is that RV kitchens are notoriously crammed. So your wall likely has a few outlets, a window, and maybe some switches/monitors. While these are not going to be tiled over, you’ll still have to include them in the count of area because you’ll cut around them. We ended up having to order 3 boxes to complete our job.
Gather the Tools
Tools for installing a tile backsplash in an RV are super basic. Nothing more needed than what you might find in your garage or kitchen. But if you’re anything like me, it’s easier to just get everything at once, otherwise you’ll have to go back and forth 10x. Here’s what you’ll need:
- Razor/Knife
- Straight Edge (e.g. metal ruler, t-square, etc.)
- Cutting Mat (or maybe cardboard piece, wood underlay, whatever to prevent scratches)
- Compass (or something to mimic the curve of the window….. we used an espresso tin lid lol)
- Screwdriver
- Garbage Bag (for the plastic backing)
- Moist Rag (to clean the walls)
- Caulk
See? Told you it was super simple. You basically don’t need anything special.
Related: Harvest Hosts Review: A Step-by-Step of the Full Experience
Prep the Area
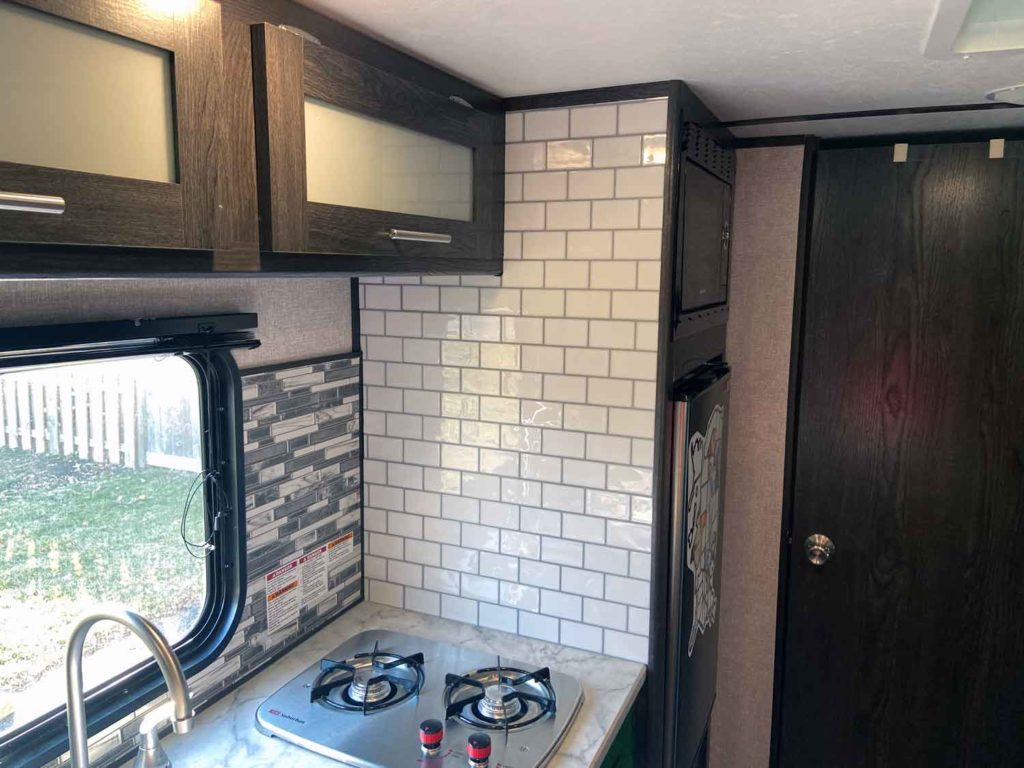
First things first: every camper is different, so the materials on which you’re applying the tiles may vary. For us, there was wood panel (cabinet, basically) and a plywood backing that we wanted to tile. Initially, the plan was to put on the cabinet and then over-top the original backsplash. But when we finished the side wall, we thought it looked really good going all the way to the top, so we backtracked and decided to take out the plywood. This made the job somewhat more difficult, but still easy enough!
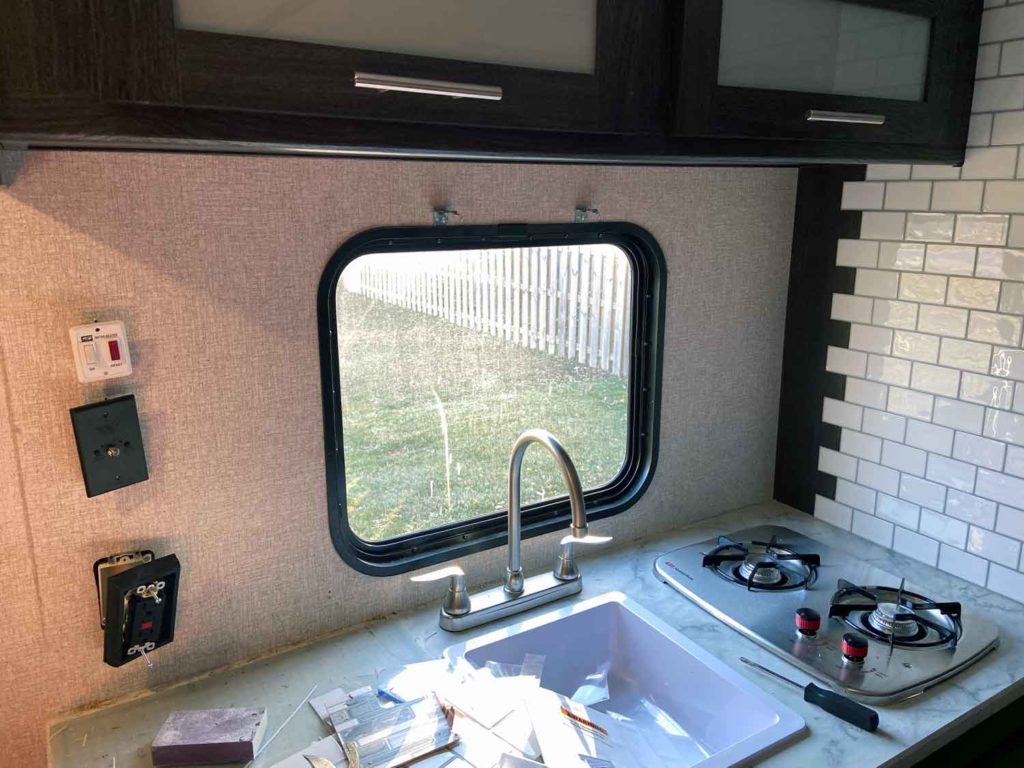
First step was to remove the blinds. Then we loosened the window frame. And then finally, took off the the outlets. This paved the way to take the plywood backing, which cut off quite nicely with a Dremel. This was totally unanticipated, so glad I had on hand. If I didn’t, it would have been slightly more of a pain to cut, but still doable easily.
Once you have the area clear and free, it’s time to clean the area. Nothing excessive to do, but you need to make sure any debris like dust, food specs, or grease are removed. Otherwise, your tile won’t stick well and you’ll be annoyed at peeling. A nice warm cloth with dish soap will do the trick. Just rinse and let dry.
Start Installing the Tile
This is the part that requires the most patience. You want to make sure that your tiles are all lined up and straight, so we started vertically instead of horizontally. Cut the same amount of tile off on each “starter” and stack them up. This will give you a nice, even line to start on. After that, it’s peel, stick, peel, stick.
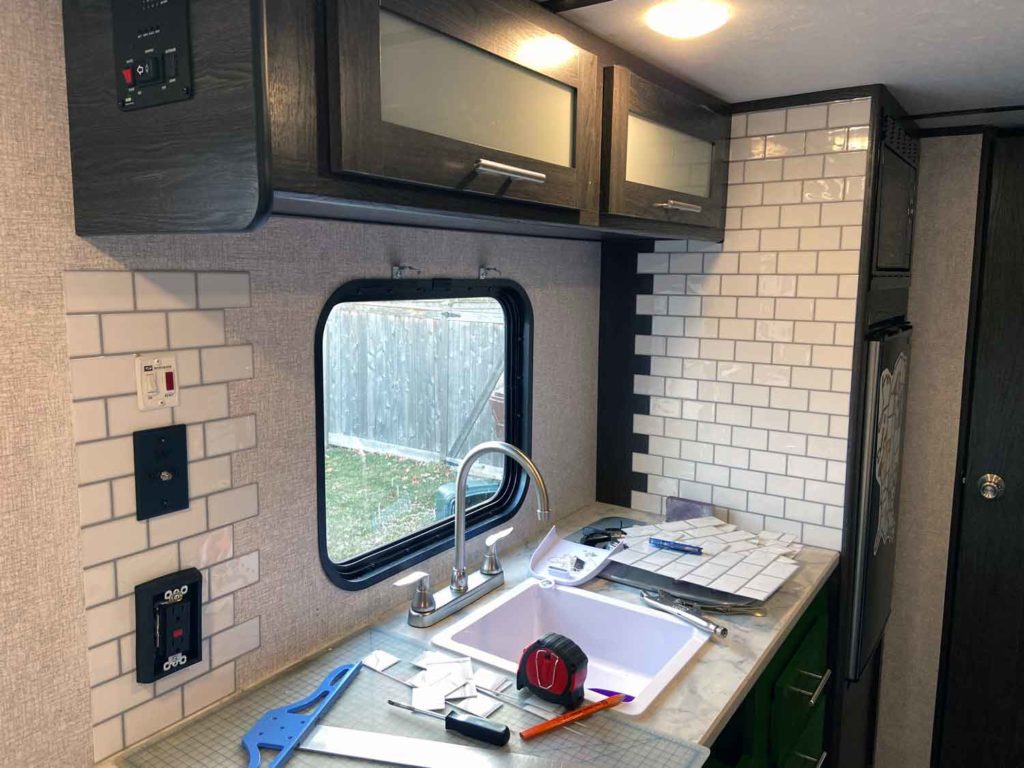
The tricky parts come when you get obstacles like outlets. For us, it was easiest to measure from the center of the outlet and then put a little hole just big enough to fit the outlet itself, but small enough so that the cover did its thing and, well, covered the hole. This can take a couple tries to get right, so don’t be afraid of going too small to start. If you’re on limited tiles and you cut too big, it could spell disaster. You can always cut more off, but you can’t add back…
The windows seem like they’d be complicated, but it actually wasn’t too bad! We took a tin can lid that closely followed the curve of the window and traced that onto the tile to cut. Once we got the right curve, we used that tile to trace on the others to mimic. It took a bit of effort, but well worth the attention to detail. After you’re done, make sure you caulk the joints so no water gets behind!
Installing a Tile Backsplash in an RV Literally is That Easy
In all, the job took about 4 hours split up between naptime and after the kids go to bed. Had we done everything in the right order (you know, having decided how much of the wall we wanted to do) we might have saved 30 minutes or an hour. But that’s that!
If you REALLY want to take your kitchen to the next level, you can paint your counters. We chose this awesome green and now the kitchen really sings! Just sand, clean, tape, and paint. Just like you would at home. If you’re spending lots of time in your camper and want to make it special, this is a way to do it on a tiny budget without having to do any major modifications.

What camper upgrades have you done so far?
You may also like:
RVing on a Budget: How to Save Money on your Next Camping Trip
12 Brilliant Camping Activities for Kids
When Does Camping Season Start? And the Best Month to go Camping
Books About Camping to Get Your Toddler Excited About the Outdoors